Introduction to Website Groups in Netsparker Enterprise and How To Use Them
Groups in Netsparker enterprise allow you to group a number of websites under a unique identifier. Groups can also be used to scan multiple websites simultaneously, thus easing the process of ensuring the security of multiple websites. Read this post for more information about the Groups feature in Netsparker Enterprise.
In Netsparker Enterprise you can use the Groups feature to group a number of websites under a common identifier. By grouping websites you can scan all the websites in that group simultaneously using the same scan policy. Websites groups scans can also be scheduled like single website security scans.
Therefore the Groups feature is another tool in Netsparker Enterprise that helps you ease the process of managing the security of many websites. This blog posts gives an introduction to Groups in Netsparker Enterprise and also uses an example to show how Groups can be used.
Why Use Website Groups in Netsparker Enterprise?
Groups allow for better management of the security of all websites in your Netsparker Enterprise account, especially if you have a large number of websites. For example you can group websites depending on their location, state or importance. Here are some practical examples:
Example 1: Staging VS Live Environments
You can use Netsparker Enterprise to scan web applications during the different stages of development and also once they are live. Considering that most probably you also have different scan policies, you can group all the staging and live websites under different groups. By doing so you can easily scan all live websites simultaneously using a specific scan policy or all the websites on the staging server using another scan policy.
Example 2: Locations of Websites
Another example would be to use Groups to split websites depending on their location. For example since there are many differences between the laws in the US and the EU, it is normal to have the US and EU based websites running under a different configuration. And since you have to use different scan policies you can use Groups to easily scan all the websites in a specific location collectively.
Can a Website Be Included in More Than One Group?
Yes, a website can be included in more than one group. For example:
- Company website (US, Critical groups)
- Staging Company website (US, Staging, Non Critical groups)
- Europe Employees Online Portal (EMEA, Critical groups)
The Default Group
By default your Netsparker Enterprise account has a built-in group called Default. This group cannot be deleted and unless specified otherwise, the new websites you add to your Netsparker Enterprise account will be automatically added to the Default group.
How Can You Create a New Website Group in Netsparker Enterprise?
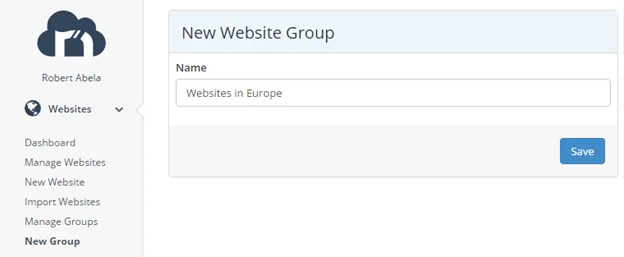
To add a new group in Netsparker Enterprise simply click on the New Group node in the Websites sidebar menu, specify a group name and save it.
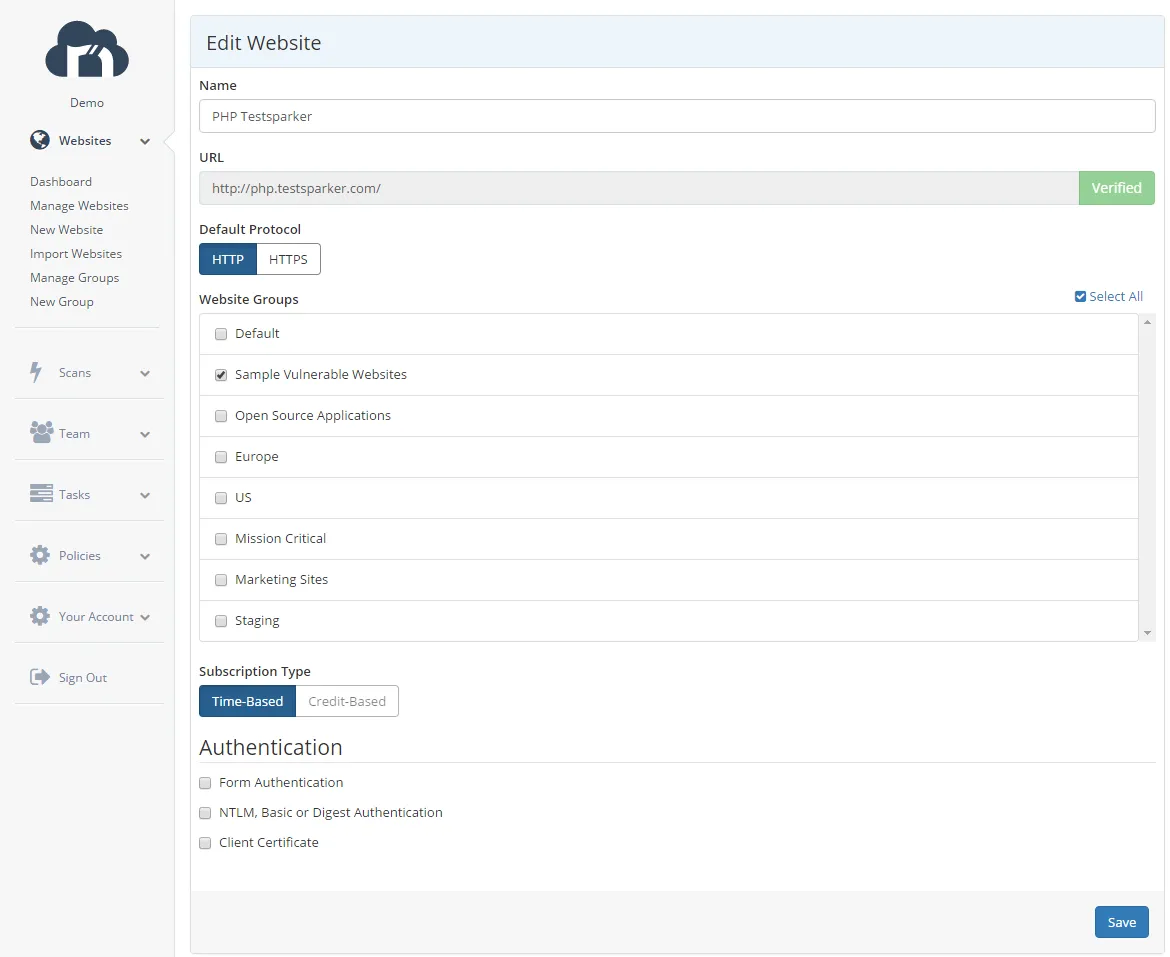
How Can I Add a Website To A Group?
To add a website to a group navigate to the website's settings and check the tickboxes of the group names you want the website to be part of.
Overview of Security State of Websites in a Group
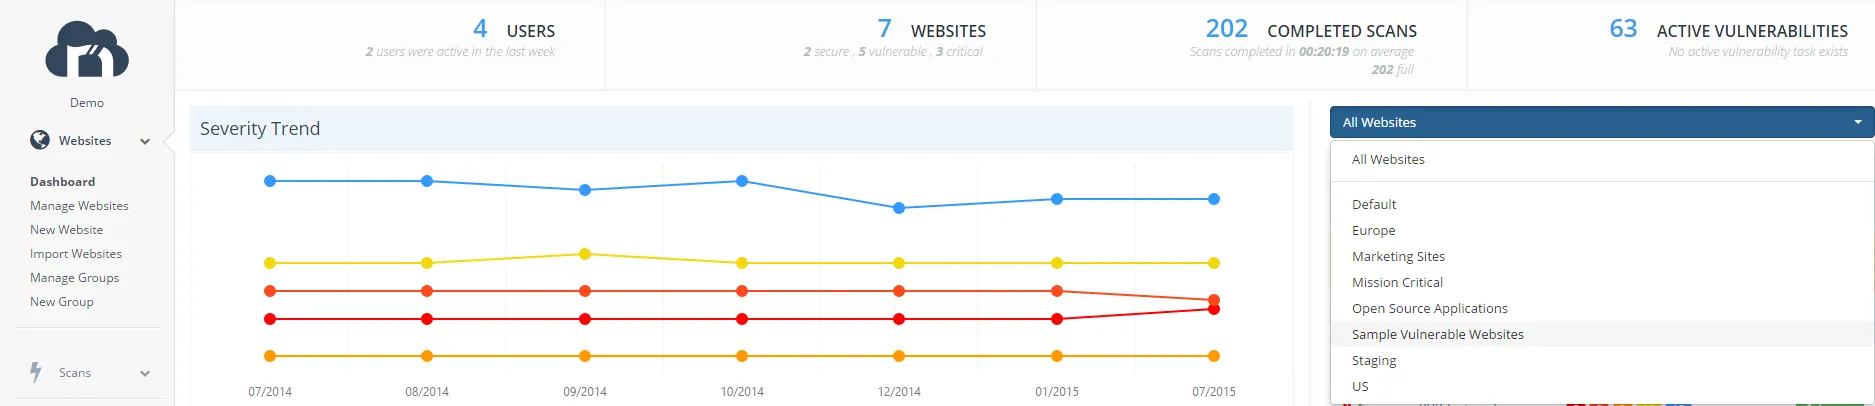
To get an overview of the security state of all websites in a particular group, navigate to Netsparker Enterprise dashboard and use the groups drop down menu to select the group. Once you select the group the Netsparker Enterprise dashboard will be updated to reflect the security state of all the websites in the chosen group.
Scanning a Number of Websites Simultaneously with Netsparker Enterprise
To scan a number of websites simultaneously in Netsparker Enterprise you should launch a group scan. There are three different methods which you can use to launch a website group scan in Netsparker Enterprise, all of which are documented below:
From the Manage Groups Node
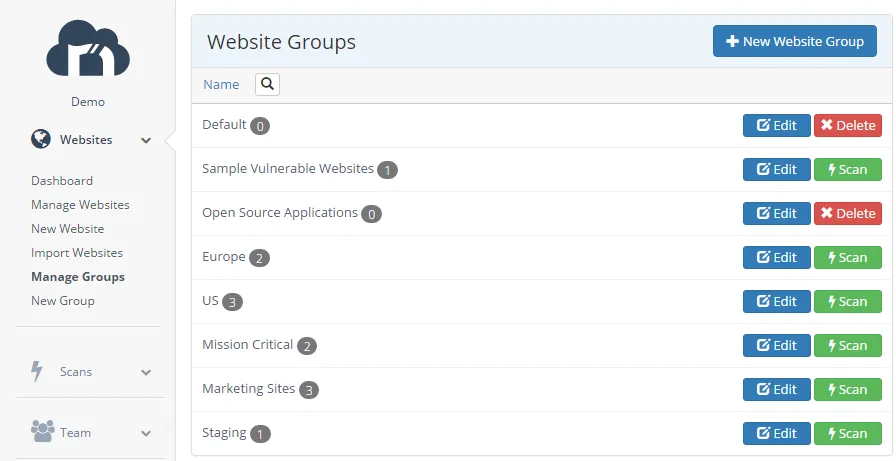
- Navigate to the Manage Groups node in the Websites sidebar menu
- Click the Scan button next to the group name to configure and launch, or schedule a web security scan.
From the Scans Sidebar Menu
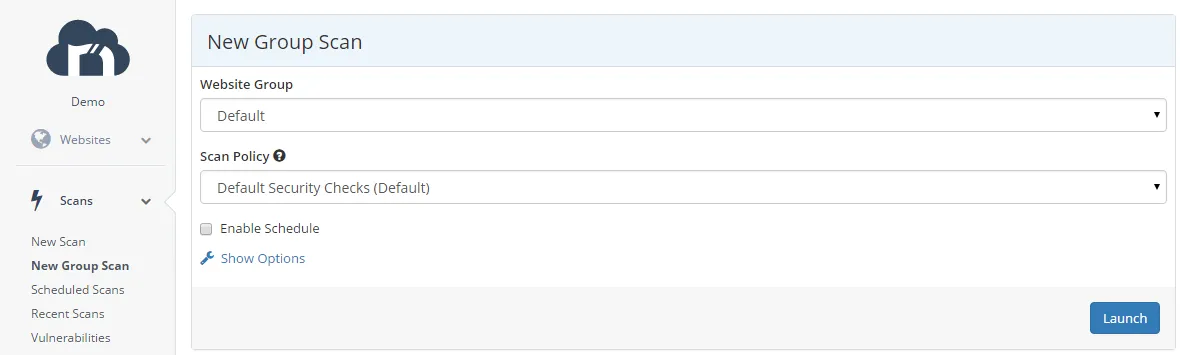
- Navigate to the New Group Scan node in the Scans sidebar menu
- Select the group from the Website Group drop down menu and select a scan policy from the drop down menu.
- Configure any scan options you need and click Launch to start the scan. Otherwise check the Enable Schedule option to configure scheduled website group scans.
From the Group Dashboard
You can also launch a scan from the group's dashboard view by clicking the Schedule scans for this website group button. Similar as with the other procedures mentioned in this article, proceed to configure, launch or schedule the web security scan.
Experience the future of AppSec
